
Meteor-example-cloudinary is a sample Meteor application that illustrates the use of Cloudinary for image uploading and display. The combination of Cloudinary’s unsigned uploading and javascript upload widget makes it quite simple to implement non-trivial image uploading and manipulation.
To illustrate these features, this sample application:
- Provides a single page that enables users to upload images to the Cloudinary service.
- The images can be located on the local file system, or via a URL, or can be created with the user’s camera (camera-based image selection available only if the site is hosted via https).
- The user must crop the selected image to a square for uploading.
- The selected image will be automatically down-sampled to 500x500 pixels if the crop area is larger for uploading.
- The selected image must be a minimum of 300x300 pixels for uploading.
- Only the cropped, (potentially down-sampled) image is stored at the Cloudinary service.
All of these constraints can be changed to suit for your own requirements, but they hopefully provide a useful starting point for many application use cases.
Please note that the overall structure of meteor-example-cloudinary is based on two other sample applications:
Please refer to these applications for more details on structure. This documentation focuses on cloudinary-specific issues.
Cloudinary Setup
To run this application, you must first define and configure a Cloudinary account.
Set up your Cloudinary account
To run this application, you must first sign up for a free Cloudinary account. The free plan (as of Summer, 2017) offers 75K total images, 2 GB storage, and 5 GB monthly bandwidth. This should be enough for demo purposes.
During the initial user configuration wizard, the “Account Settings” dialog will provide the option to enable unsigned uploads. You should enable this feature.
Create an “upload preset”
Now create an “upload preset” to allow unsigned uploading. You create an upload preset in the Settings / Upload area of your Cloudinary management dashboard. After it’s been created, you will see something like this:
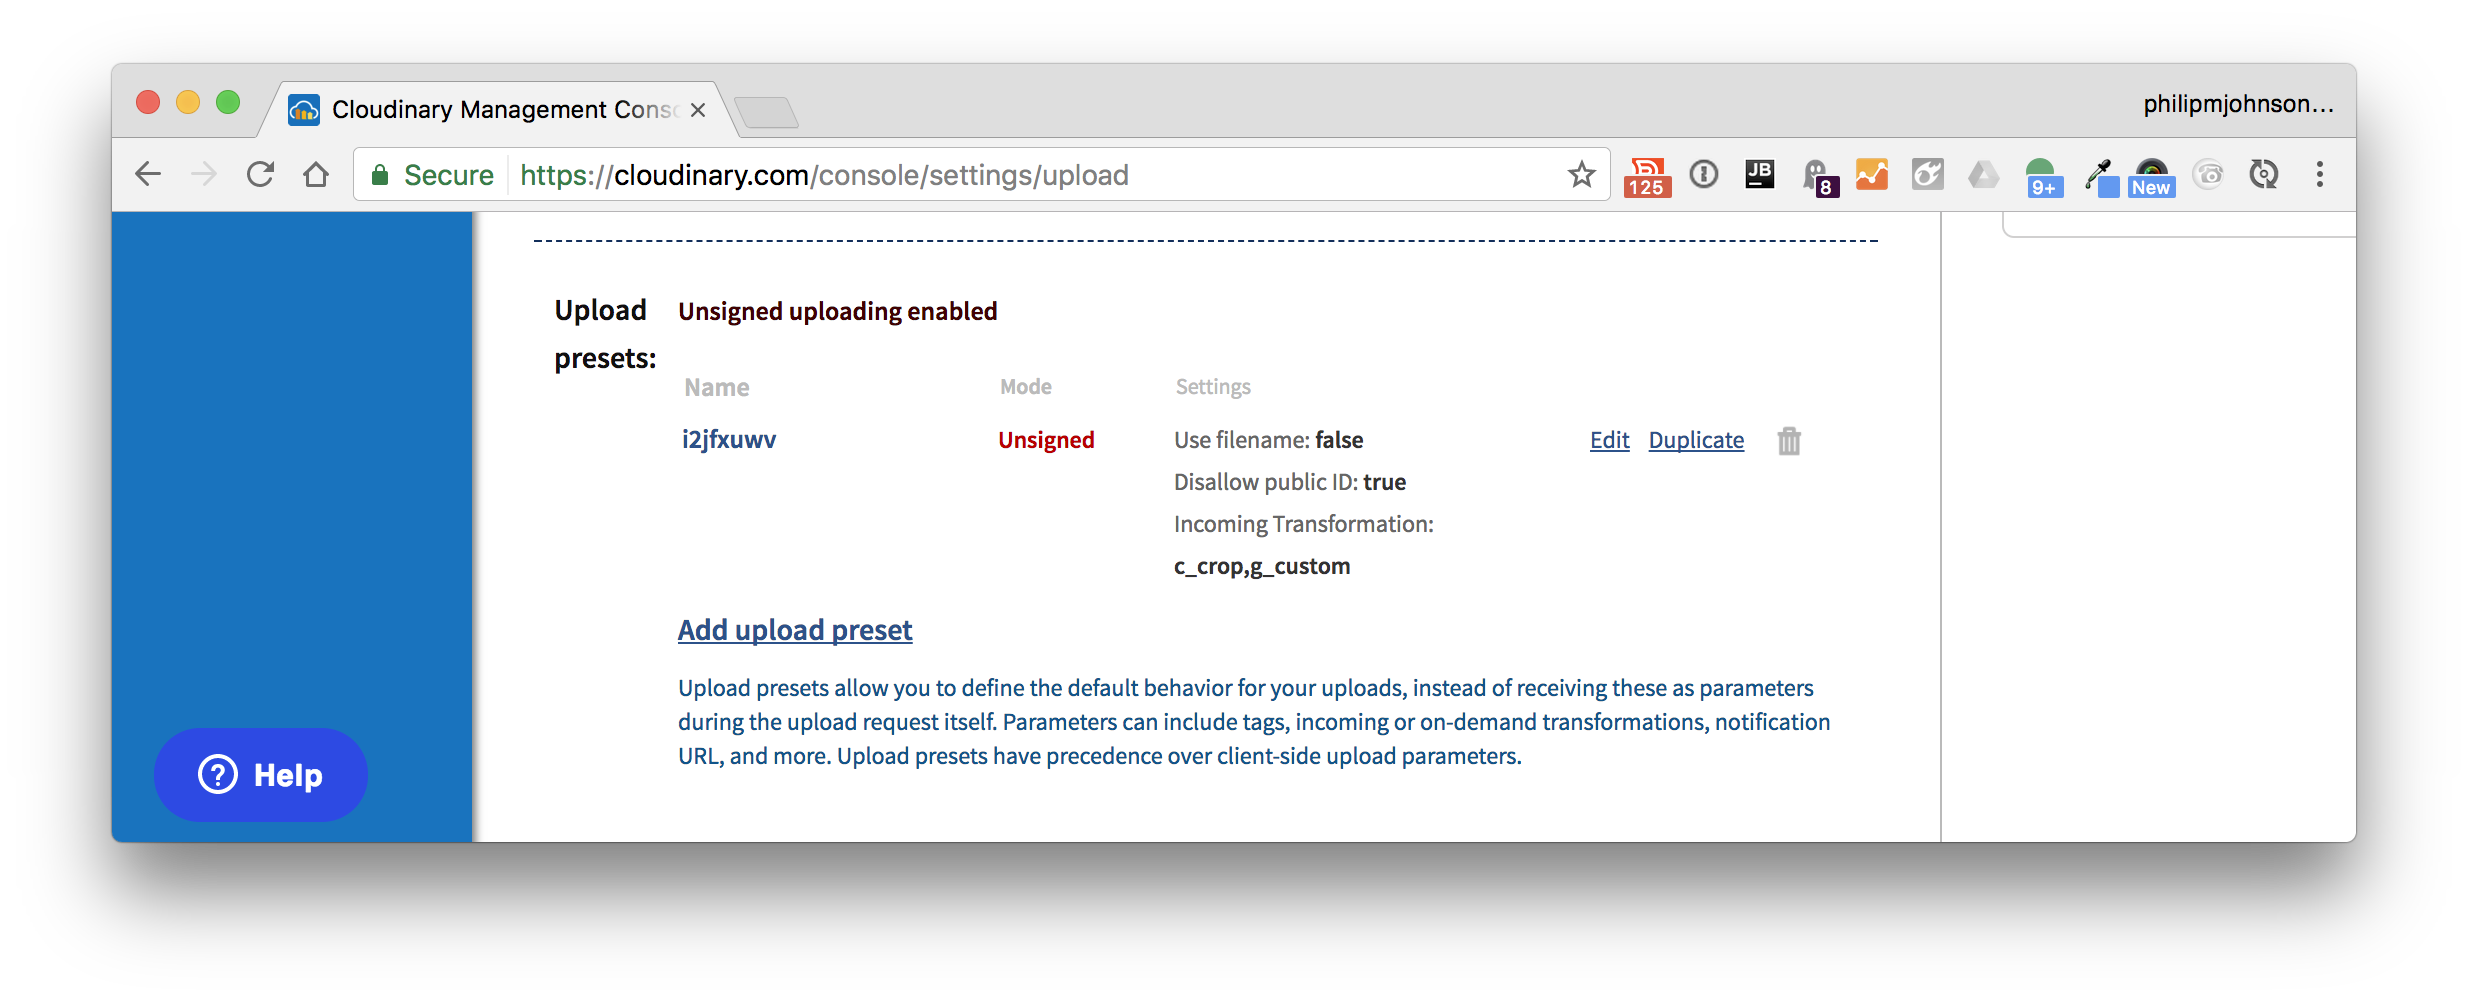
Note that unsigned uploading enables anyone who obtains your upload preset string to upload new images to your Cloudinary account (but not edit or delete any existing images). If this creates a security risk for your application, then you will want to switch to signed uploading prior to putting your application into production.
(The upload preset string shown in this documentation has subsequently been changed.)
Define an incoming transformation so that you store only the cropped image
By default, Cloudinary will store the entire selected image along with the coordinates of the cropped portion. To specify that Cloudinary should store only the result of cropping, you must define an incoming transformation. For this application, you want to create an incoming transformation that specifies the mode as “crop” and the gravity as “custom”. Here’s what the dialog looks like:
![]()
Application setup
Download and install the application.
First, install Meteor.
Second, download a zip file containing a snapshot of meteor-example-cloudinary.
Third, expand the zip file, cd into the app directory, and install the required libraries with:
$ meteor npm install
Create config/settings.production.json
Make a copy of config/settings.development.json, and call it settings.production.json. (This file is git-ignored, so you can put your upload preset information in it and it will not be committed to GitHub.)
Edit this file to contain your account’s cloud name and upload preset. For example:
{
  "public": {
    "cloudinary": {"cloud_name": "ddv7bs7cx", "upload_preset": "i2jfxuwv"}
  }
}
Note that I’ve subsequently changed the value for my upload preset.
Run the program
Now you can run the application by invoking the “start” script in the package.json file:
$ meteor npm run start
Note regarding bcrypt warning. You will get the following message when you run this application:
Note: you are using a pure-JavaScript implementation of bcrypt.
While this implementation will work correctly, it is known to be
approximately three times slower than the native implementation.
In order to use the native implementation instead, run

  meteor npm install --save bcrypt

in the root directory of your application.
On some operating systems (particularly Windows), installing bcrypt is much more difficult than implied by the above message. Bcrypt is only used in Meteor for password checking, so the performance implications are negligible until your site has very high traffic. You can safely ignore this warning without any problems.
If all goes well, the template application will appear at http://localhost:3000.
Walkthrough
When the application runs for the first time, the home page (actually, the only page) should look like this:

If you click the submit button without filling in either the name or image fields, the system will note an error:

Let’s say we want to add an image of Jerry Garcia, which we have conveniently located on our desktop. We can type his name into the “Name” field, and then click the “Upload image file” button, which brings up the Cloudinary Upload Widget:
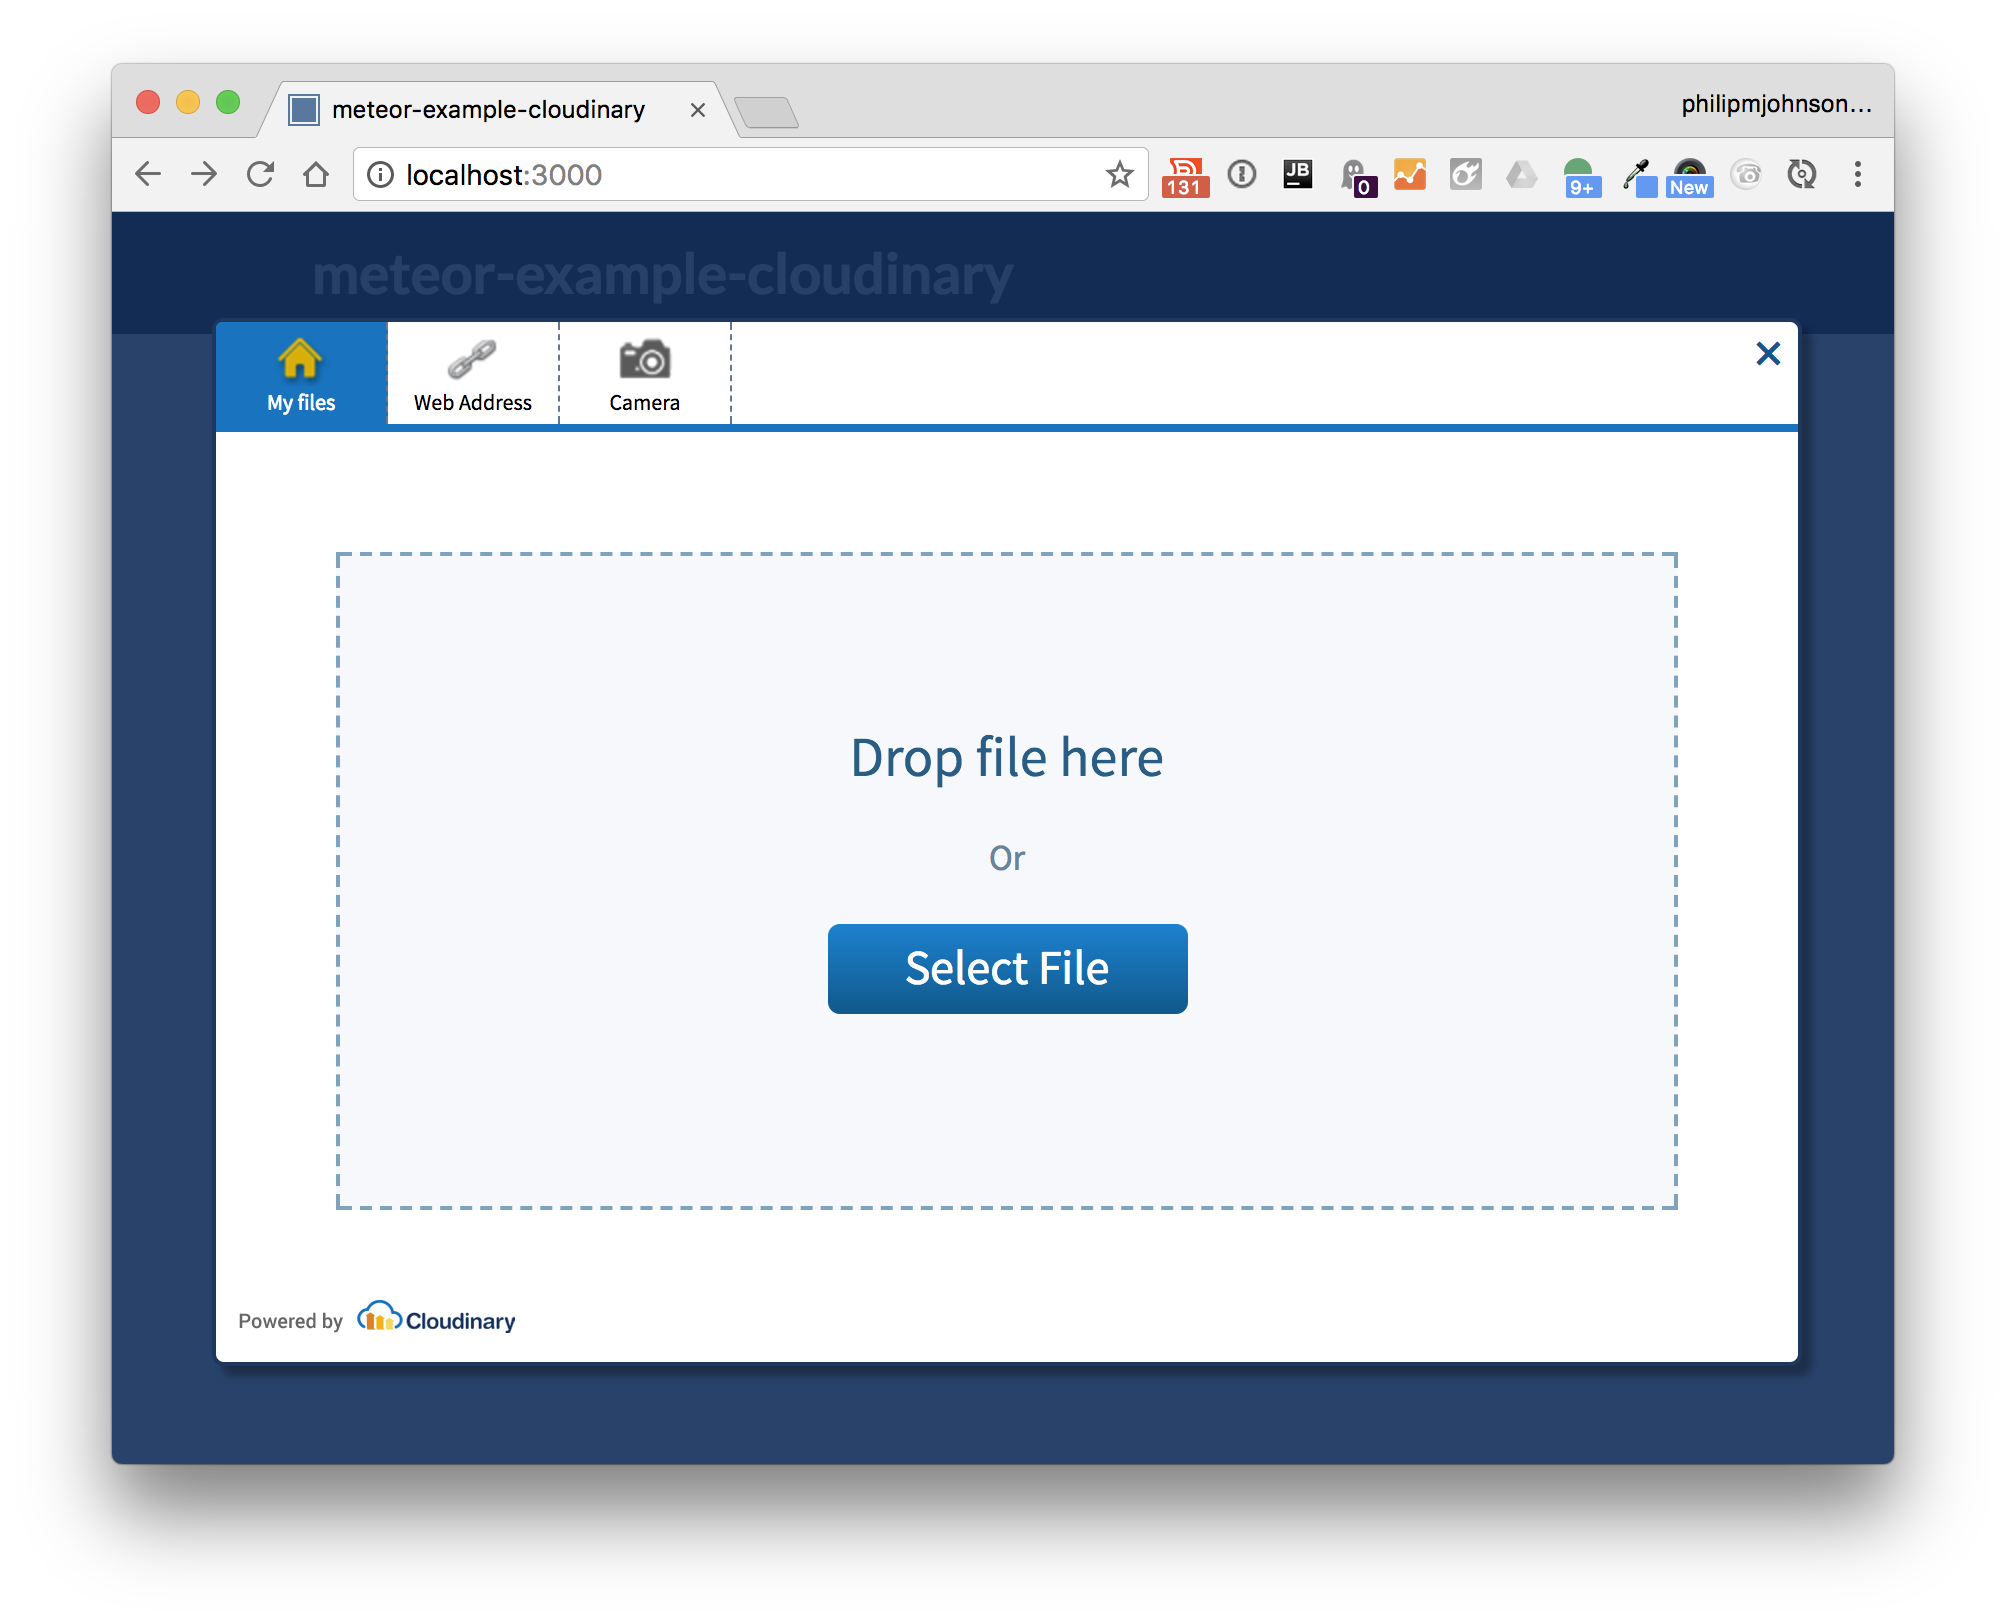
Then we can click “Select File”, and choose the file of Jerry on our desktop. The widget then displays the image along with the cropping square:
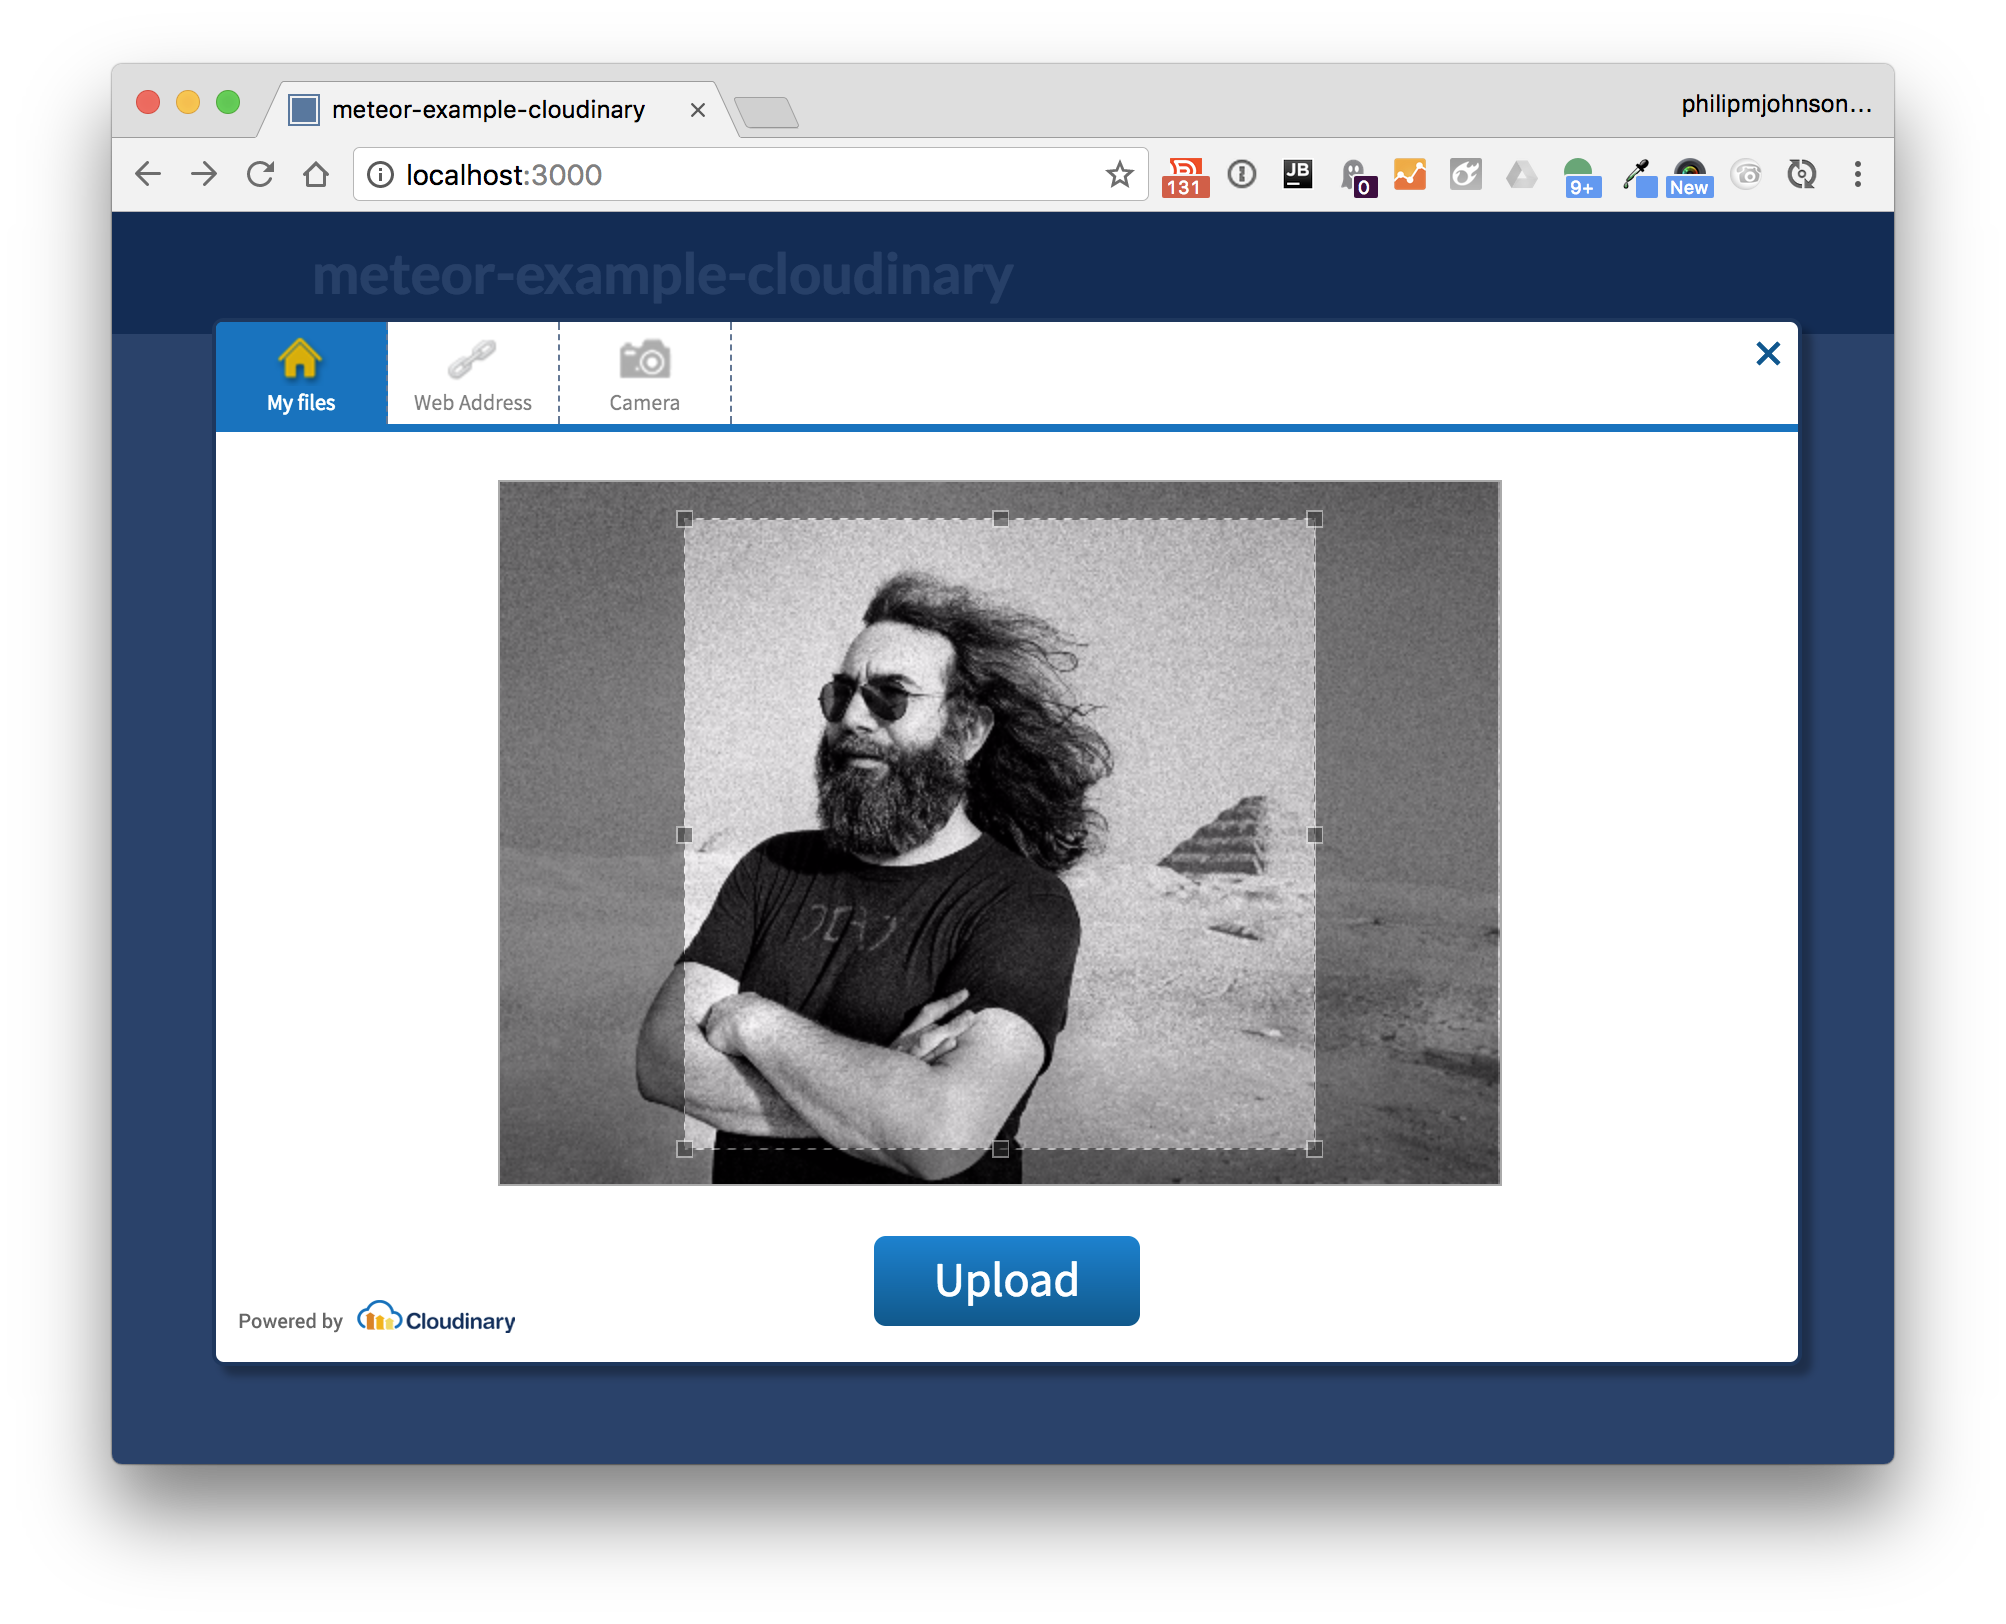
The requirement to crop, and the constraint that the crop yield a square, is easily changed in the example source code.
If you now click “Upload”, two things happen. First, the image is uploaded to Cloudinary. Second, you are returned to the Meteor form and the image field is filled in with the file name (“jerry”):
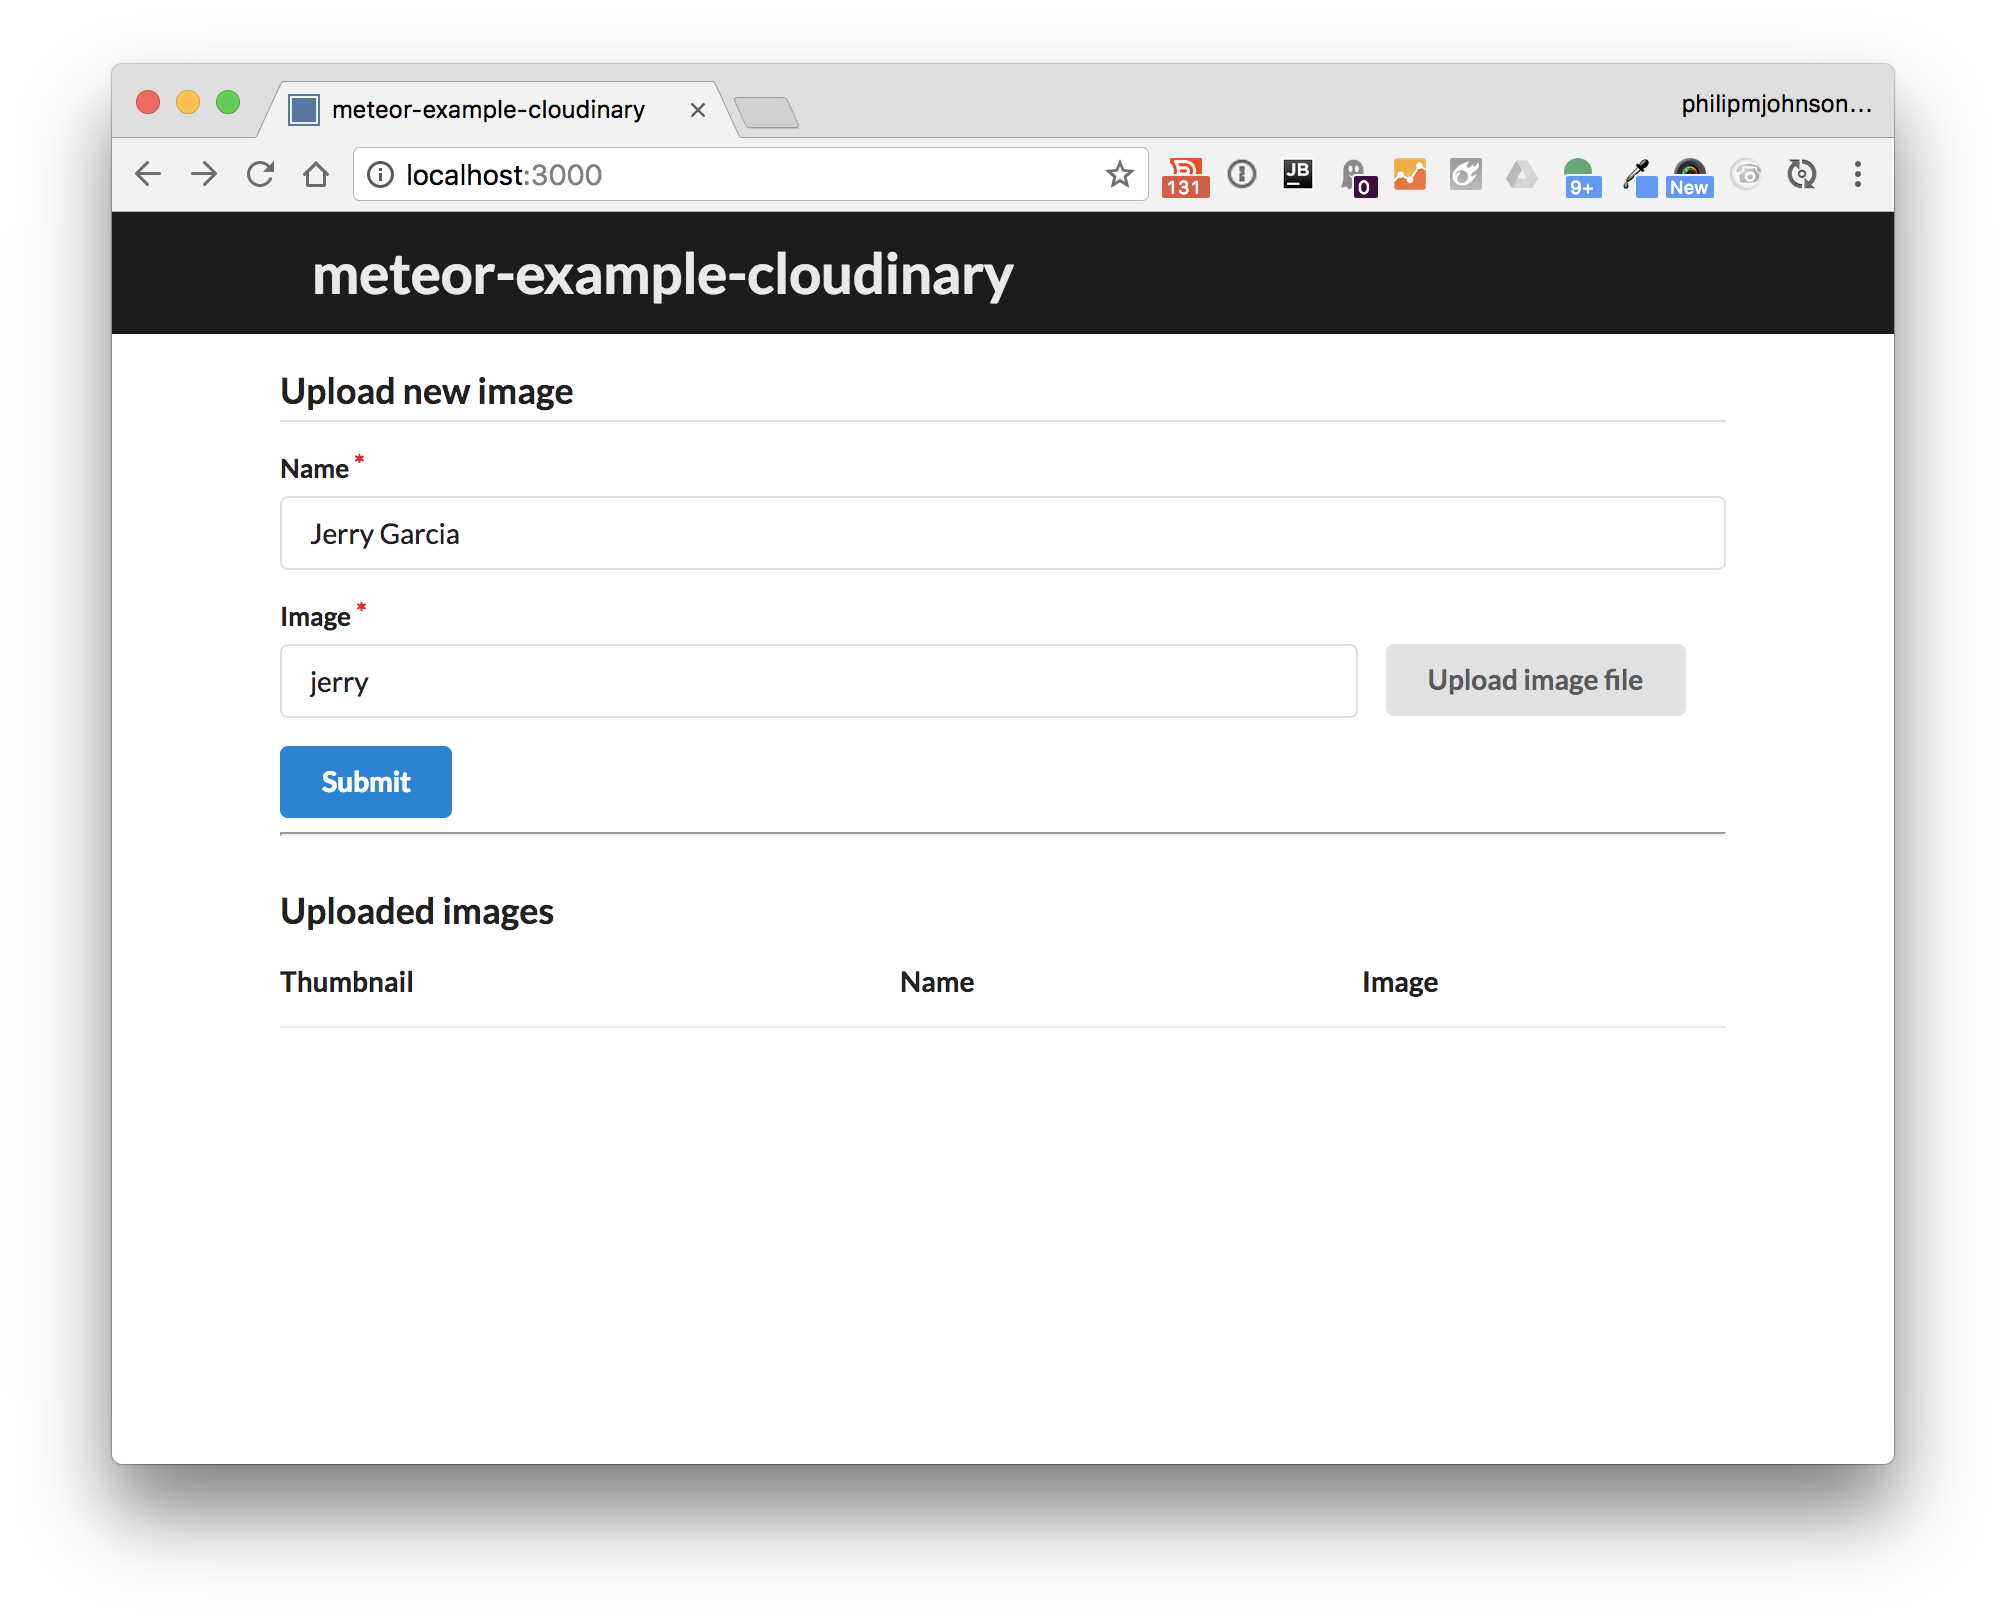
At this point, the image has already been uploaded to Cloudinary, but since we have not yet submitted this form, the Meteor application does not know about the image. So, let’s click “Submit” to submit the form with the pointer to the uploaded image. Once we do that, the page looks like this:

After pressing submit, the form submission process adds a new document to a Meteor collection containing the image name and the URLs returned by the Cloudinary upload widget for a thumbnail view as well as the full size (cropped) image. The page has a simple table below the form to display all of the documents in this collection. It is reactively updated with the new contents of the collection.
Note that if we go to our Cloudinary Media Library page, we can now see the uploaded image, which is stored in its cropped and down-sampled form:

Code Walkthrough
For more details on how this application is constructed, please watch a brief overview by clicking on the image below:

Cloudinary documentation
Here are some links to Cloudinary documentation that I found useful when developing this application: