Summary
This project shows how to set up your Play Framework application to:
- use MySQL locally.
- deploy to CloudBees and configure to use their MySQL database.
Local use of MySQL with Play
Here are the steps to use MySQL locally for development of Play applications:
1. Download and install MySQL
Install MySQL by downloading the MySQL Community Server following the instructions. This project was tested using MySQL Community Server 5.6.12 for Mac OS X version 10.7 (x86, 64 bit).
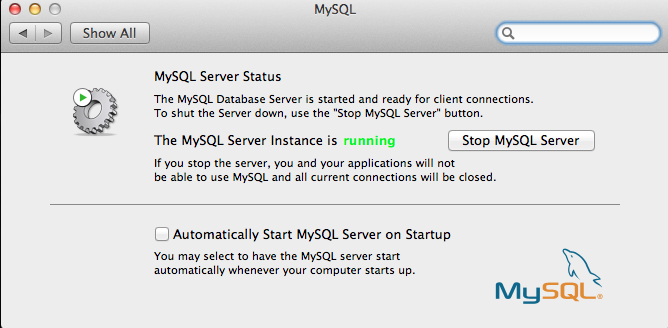
2. Start MySQL
This varies depending upon the platform. On a Mac, the installation process enables you to create a preferences panel where you can start or stop your local MySQL server:
3. Set root password
The most important thing to do following your local installation is to immediately create a password for the root accounts. The following commands show one way to do it:
$ mysql -u root
mysql> select User, Host, Password from mysql.user;
mysql> update mysql.user SET Password = PASSWORD('ReplaceWithGoodPassword') WHERE User = 'root';
mysql> flush privileges;
See the post-installation instructions for more information on configuring your MySQL installation. For example, you might want to drop the "test" database, or restrict anonymous use.
4. Create user and password environment variables
There are at least two good reasons you shouldn't put your MySQL credentials (username and password) in your Play application.conf file if you are using a cloud-based hosting service such as GitHub:
- Other developers working on the system will either have to define the same credentials or override yours;
- It is just totally lame to put credentials into publicly available files hosted online.
Fortunately, there is an easy solution: reference environment variables that point to the actual credentials. To support this approach, define three environment variables with the MySQL username and password you wish to use for local Play development. On Unix, you might edit ~/.profile to include:
export DATABASE_URL_DB=mysql://localhost/playexamplemysql?characterEncoding=UTF-8
export DATABASE_USERNAME_DB=root
export DATABASE_PASSWORD_DB=YourPasswordHere
If you choose to create a new MySQL user rather than using the root user, then you will need to be sure to grant that user privileges for the database manipulated by the application.
5. Create the database to be used with your Play application
A significant difference between Play's default "H2" database and MySQL is that H2 will automatically create the database to be used with your Play application, but MySQL will not. Thus, you have to manually create the MySQL database to be used with your application.
For this example, we will call our database "playexamplemysql". Assuming we are using the root user for Play development, you can create it in MySQL with the following
$ mysql -u root -p
Enter password: <enter password here>
mysql> create database playexamplemysql;
Query OK, 1 row affected (0.00 sec)
mysql> exit
6. Edit build.sbt
Add this line:
"mysql" % "mysql-connector-java" % "5.1.21"
See the example build.sbt file for details.
7. Edit application.conf
Edit four properties to reference your environment variables as follows:
db.default.driver=com.mysql.jdbc.Driver
db.default.url="jdbc:"${DATABASE_URL_DB}
db.default.user=${DATABASE_USERNAME_DB}
db.default.password=${DATABASE_PASSWORD_DB}
Note that this is conveniently the exact syntax required by CloudBees, so the same lines will work for local development and remote CloudBees deployment.
To enable the ORM to automatically create and maintain the MySQL tables and schemas associated with your application, add the following line in the Evolutions section:
applyEvolutions.default=true
Finally, to activate the Ebean ORM, uncomment the following line:
ebean.default="models.*"
See the example application.conf to see all these changes in context.
8. Delete the existing conf/evolutions directory (if present).
If you have been doing development with the default H2 database, and are now transitioning to MySQL, you should delete the conf/evolutions directory, because it contains SQL statements that are legal in H2 (such as "create sequence") but illegal in MySQL. This will force Play to recreate the conf/evolutions directory and a 1.sql file from scratch using legal MySQL syntax the next time you invoke "play run".
9. Invoke "play run".
Invoking "play run" will run Play in "development mode", resulting in the creation of MySQL tables appropriate for your Model classes.
(Optional) Test your local Play+MySQL installation.
If you run into problems, an easy way to test your local MySQL installation is to run this sample application (play-example-mysql). This application minimally enhances the default Play application with a single entity (PageRetrieval), an instance of which is created and saved in the MySQL database each time the home page is retrieved. The index controller is modified to retrieve the total number of PageRetrieval instances from the database each time a request for the home page is received, and creates a string indicating the total in the home page.
The following screen shot illustrates the running application:
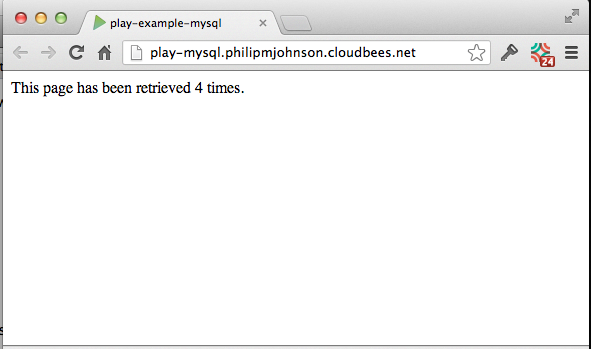
Each time you refresh the page, the number displayed will increment.
To test your MySQL installation using play-example-mysql, do the following:
- Install and run MySQL as described above.
- Define the three environment variables as specified above.
- Download the source code, cd into the directory, and invoke "play run". (Using the run command invokes Play in "development mode", which will run evolutions to set up the appropriate tables in your MySQL database.)
- Retrieve the system in your browser at http://localhost:9000
- Refresh the page. You should see the top line change to indicate a new number of page retrievals.
- Stop the system (control-D in the Play console). You will return to the shell.
- Invoke "play run" again, and refresh the page in your browser. You should see an updated number of page retrievals indicating that the state of the database survived a web server restart.
CloudBees deployment
You will normally want to do local development in Play's "development mode" so that Play can manage and evolve the database schemas (table definitions) for you automatically. That's a big win. The major conceptual change for CloudBees deployment is that it uses Play's "production mode", which requires database schemas to be managed manually.
So, to deploy your application to CloudBees, you must:
- Create the Play application stack on CloudBees.
- Manually create the table structure of your database.
- Disable database evolution.
- Deploy a distribution of the application to CloudBees.
Here's one of several possible ways to accomplish the above four steps.
1. Create the Play application stack on CloudBees.
Login to CloudBees, and use the ClickStart mechanism to create a new default Play application. For this example, I created a CloudBees application called "play-mysql". I recommend that you keep your CloudBees application names to 16 characters or less in order to avoid truncation. The benefit of using ClickStart is that it automates the details of associating a MySQL database to a Play application.
2. Manually create the table structure of your database.
As part of your local development, you will have created the folder conf/evolutions/default containing a set of .sql files with all of the SQL commands necessary to create your MySQL database. For the play-example-mysql application, it consists of just a single table definition located in 1.sql.
Here is the table definition from that file that we need to recreate in CloudBees:
create table page_retrieval (
  id                        bigint auto_increment not null,
  timestamp                 bigint,
  constraint pk_page_retrieval primary key (id))
;
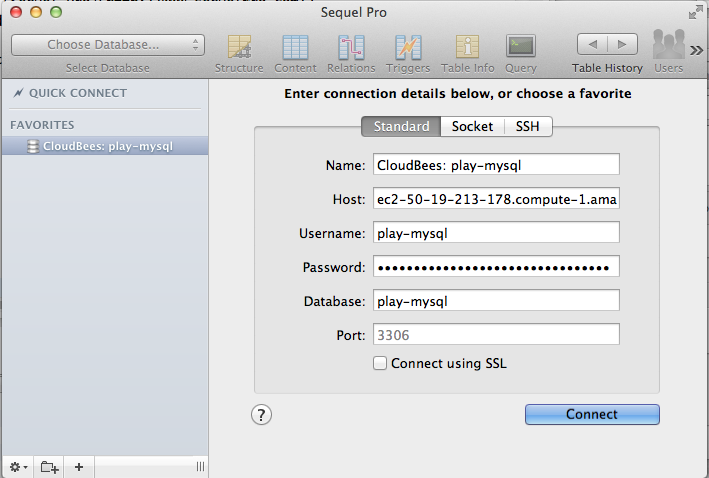
To create this table in CloudBees, you will need to login directly to the database using a MySQL client. On a Mac, a reasonable open source choice for the client is Sequel Pro. Regardless of the client you choose, you will need to obtain the database credentials from CloudBees. Do this by installing the CloudBees SDK and then invoking "bees db:info -p youraccount/dbname". For example, here's what I get for my example application:
$ bees db:info -p philipmjohnson/play-mysql
  Database name: play-mysql
  Account:       philipmjohnson
  Created:       Mon Jul 29 12:38:19 HST 2013
  Status:        active
  Master:        ec2-50-19-213-178.compute-1.amazonaws.com:3306
  Port:          3306
  Username:      play-mysql
  Password:      a8f8notmyrealpassword132904c2f
I can use the "Master", "Port", "Username", "Database name", and "Password" values to connect using Sequel Pro as shown in the following screen shot:
Once connected, I can simply paste the page_retrieval table creation statement into the Query window and execute it to create the table.
It is interesting to note that in local development, you must create the database manually but tables are managed for you automatically, while CloudBees deployment is the opposite: it will create the database for you automatically but requires you to manually manage the tables.
3. Disable database evolutions.
CloudBees needs you to disable evolutions on your application, even though you will want them enabled for local development. An easy way to achieve both is to create an alternative configuration file for use by CloudBees. I do this by creating application.cloudbees.conf in the same directory as the application.conf file. It is very simple:
# This is the CloudBees configuration file for the application.
# ~~~~~

include "application.conf"

# Evolutions
# ~~~~~

# Disable evolutions when using CloudBees
evolutionplugin=disabled
applyEvolutions.default=false
To tell CloudBees to use this file instead of application.conf, execute the "bees config:set" command, supplying your account and application names and the alternative application.conf file. Here's an example invocation of this command for the play-mysql application:
$ bees config:set -a philipmjohnson/play-mysql config.resource=application.cloudbees.conf
  Application config parameters for philipmjohnson/play-mysql: saved

  Application Parameters:
    proxyBuffering=false
    http_version=1.1
    AppDynamics=false
    config.resource=application.cloudbees.conf
  Runtime Parameters:
    java_version=1.7
4. Deploy a distribution of the application to CloudBees.
Option 1: Manually. First, create a distribution zip file of your system by invoking "play dist". For example:
$ play dist
[info] Loading project definition from /Users/johnson/projecthosting/github/play-example-mysql/project
[info] Set current project to play-example-mysql (in build file:/Users/johnson/projecthosting/github/play-example-mysql/)
[info] Packaging /Users/johnson/projecthosting/github/play-example-mysql/target/scala-2.10/play-example-mysql_2.10-1.0-SNAPSHOT-sources.jar ...
[info] Done packaging.
[info] Main Scala API documentation to /Users/johnson/projecthosting/github/play-example-mysql/target/scala-2.10/api...
[info] Wrote /Users/johnson/projecthosting/github/play-example-mysql/target/scala-2.10/play-example-mysql_2.10-1.0-SNAPSHOT.pom
[info] Packaging /Users/johnson/projecthosting/github/play-example-mysql/target/scala-2.10/play-example-mysql_2.10-1.0-SNAPSHOT.jar ...
[info] Done packaging.
model contains 19 documentable templates
[info] Main Scala API documentation successful.
[info] Packaging /Users/johnson/projecthosting/github/play-example-mysql/target/scala-2.10/play-example-mysql_2.10-1.0-SNAPSHOT-javadoc.jar ...
[info] Done packaging.
[info]
[info] Your package is ready in /Users/johnson/projecthosting/github/play-example-mysql/target/universal/play-example-mysql-1.0-SNAPSHOT.zip
[info]
[success] Total time: 8 s, completed Nov 12, 2013 4:07:26 PM
Next, send that distribution file to CloudBees using the "bees app:deploy" command. For example:
$ bees app:deploy -d false -R java_version=1.7 -a philipmjohnson/play-mysql -t play2 target/universal/play-example-mysql-1.0-SNAPSHOT.zip
Deploying application philipmjohnson/play-mysql (environment: ): target/universal/play-example-mysql-1.0-SNAPSHOT.zip
Application parameters: {containerType=play2}
Runtime parameters: {java_version=1.7}
........................uploaded 25%
........................uploaded 50%
........................uploaded 75%
........................upload completed
deploying application to server(s)...
Application philipmjohnson/play-mysql deployed: http://play-mysql.philipmjohnson.cloudbees.net
Now you should be able to retrieve the application at the URL above:
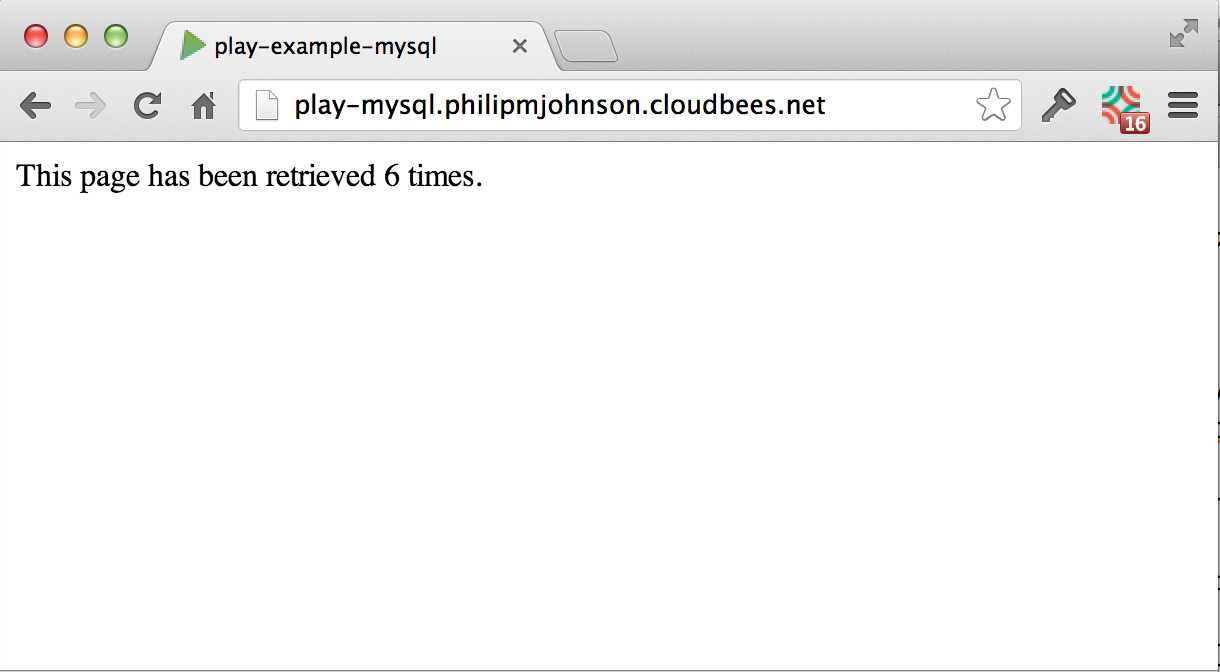
You can refresh this page and see that the counter is updated.
Option 2: Continuous Integration. Another second approach is to automate the deployment of your application by triggering a build and deployment each time you commit. To see how to do that, look at the play-example-continuous-integration project.
Acknowledgements
Many thanks to Felix Belzunce of CloudBees who patiently and promptly answered my many questions as I developed this tutorial.